wooden boat

wooden boat

Monday, 10 September 2012

Boat Windshield

 Time to get the screen template underway! After a trip to Homebase i found a piece of polycarbonate 2mm sheet that was reduced because the corner  was knocked off .


I used a hotmelt  glue gun to glue on the offcuts to make up the length as the piece of polycarb was not large enough.


Carefully scribing the polycarb to fit the deck first and then cutting the top to match the frame. 


The  Jigsaw was fitted with a metal cutting blade and the fastest speed setting which almost melted the polycarb as it cut, then i cleaned up the cut edge with a low angle block plane.


                                                                                               I had to reshape the frame to get the right angle for the screen to fit nicely.

I left my windscreen frame out over winter and it developed a black mold that i i tried to shift by sanding but with no luck. I was strugling to find a solution to this problem when my Godfather Ron Brookes suggested that i try some Oxalic Acid , so have just sent off for some and will let you all know how i get on .

Sunday, 26 August 2012

Boat Steering


I cut a hole in the dashboard with a hole saw and then used a wood rasp to get the desired angle.

The steering boss was sunk into the dash to get the steering wheel spacing correct, so it will need brackets to mount it to the back.


Here i have made some wooden blocks that i glued and screwed to the dashboard, then the metal brackets were screwed to this . The steering mount is now securely fastened.


The steering rack was fixed to the pinion with bearings and then the rack was mounted to two wooden battens.


The steering wheel came from Lake Michigan and is an original 1950S Boat wheel. It was in need of some TLC so after using some paint stripper to get the old paint off i primed the wheel with grey Zinc primer then applied 4 coats of white primer to prepare for the top coats . I decided to go with the blue and white theme that used for the seats and sprayed the half the wheel with gloss white then masked off and used gloss blue , I layed 6 coats of each colour and then finished with anouther 6 coats of clear laquer .

Transom modification.

Decided not to have a jack plate but to add on to the height of the Transom instead. This addition will allow me to mount the 75hp Mercury outboard directly to the back and will mean the steering arm will operate within the Splashwell with some minor adjustments.:)
 I used a 35mm bulk of Mahogany that i found in the wood shed.  The template was made with 3mm mdf and then transfered to the Mahogany and cut out roughly with a jig saw, then i sanded with the belt sander to get the final fit. I cut a slot in the Transom and a corasponding slot in the new piece of wood and made a sapele tongue to fit, this meant that i could position the transom precisely . Both surfaces were smeared with a liberal helping of epoxy and clamped until set.


Photo on the right shows the outboard mount template taped to the back of the Transom in roughly the position it will sit.

Friday, 17 August 2012

Boat seats

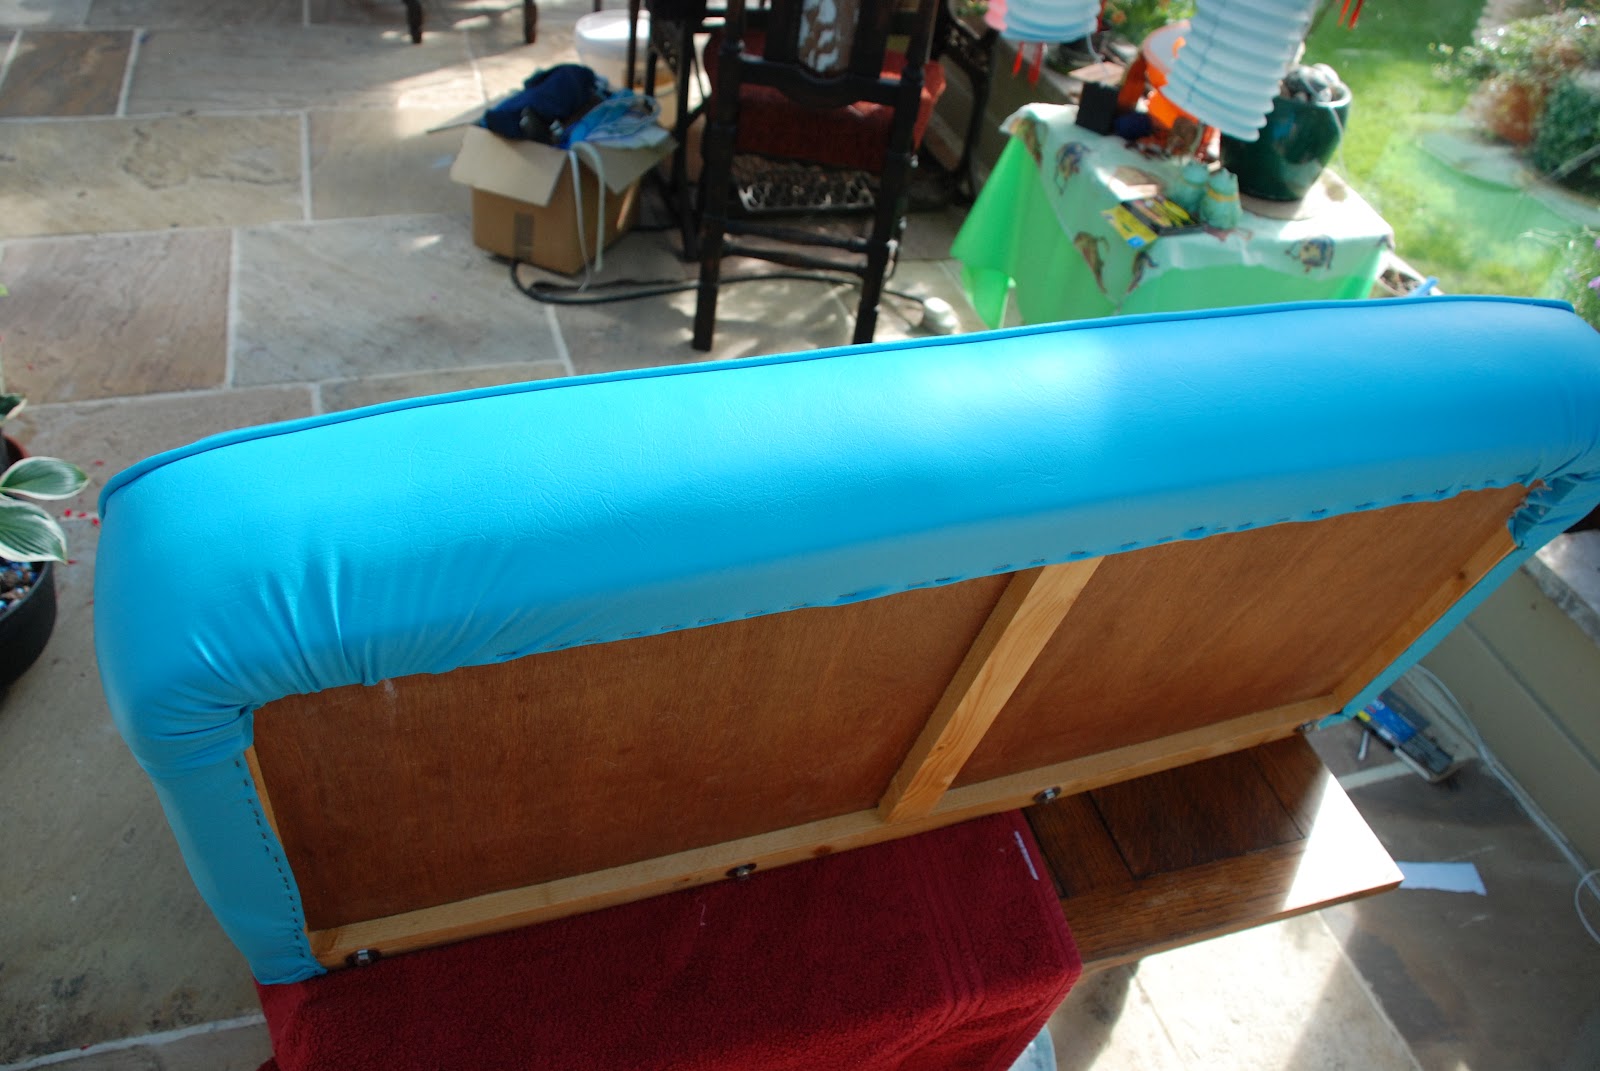
 The finished rear bench seat in all its glory! To say i am pleased with the finished seat would be an understatement, i cant stop smiling.
 I glued the 4" foam to the wooden seat base and covered that with wadding,then slipped the covers over and pulled tight before holding in place using stainless steel staples and a good quality industrial hand staple gun.


The tuck n roll worked well and i think gives a nice contrast to the aqua blue piped border'

  This picture shows the back of the seat and the neat finish achieved by doubling the vinyl over and stapling through a double thickness , this also gives strength to the fixing.


Here are a few pictures of the rear seat in position in
the back of the boat (Looking Good!) This seat is
hinged on the front edge to tip forward and allow
access to the fuel tanks and battery .

Wednesday, 8 August 2012

Boat Deck Varnish


The picture below shows one coat of varnish and the one above shows the deck after 5 coats, starting to build up nicely now
.
Started the Varnishing today !  using Hempel Dura Gloss Varnish as it is a quick drying one part varnish so no need for measuring amounts and mixing.


I started by flatting back the Q19 base coats with 360 grade wet and dry , then spent time with the hoover and a toothbrush getting all the dust out of all the cracks and crevices . Lastly i went over the surface with a tack rag to remove all traces of dust

I used the Varnish straight out of the tin and managed to get a nice flow ,which was helped by it being overcast and windless , temperature was 19 and humidity at 60 .  My 4" flat synthetic varnish brush worked very well and all of the brushstrokes settled out, the trick is to work quickly getting the varnish on , about an area of a square foot and then brush out in one direction , dont work the varnish too much and plan you're root around the boat so as to always work on the wet edge as much as possible .  When its done check for runs or sags and then walk away as you will create dust if you hover around for too long '

Saturday, 28 July 2012

Cradle


Now that the boat is upturned it seems the opportune time to make a Cradle to allow the boat to be moved around when in storage. For this i have cut some 3"x1" pine to size following the contour of the underside of the hull. 


I have used 4"x4" pine blocks of wood to support the castor wheels which are swivel units to allow for smooth movement in any direction.

Monday, 23 July 2012

Antifoul and Rubrails

The Bow center Rubrail has been fitted using Sikaflex and bronze screws. I have also drilled the hole for the Bow eye in the front of the bow .

Four coats of Antifoul applied and the rub rails have been fitted. I bedded the brass Rub rails on a bead of white Sikaflex and used bronze screws to fix down, then wiped the excess off with a cloth.

I will leave the Antifoul to set hard for a while yet before i try to flatten and polish.
Really hot day today so i decided to take advantage and start the antifouling on the bottom of the boat. I started by using a scotch brite pad and soapy water to get rid of any amine blush on the boat as i had previosly coated the bottom of the boat with 2 coats of west systems epoxy resin . Then i wiped down with a cloth and used 180 grit wet and dry and soapy water to key the epoxy coating , ending with a wash down with clean water and a lint free cloth.

Once dried i masked off below the chine using some old paper and masking tape. Ready for the paint which is Hempel hard racing antifoul in white, thinned out by 5% with Hempel thinners i decanted some into a roller tray and used 4" foam rollers to roll the paint on .

The photo shows the first coat which i think has covered quite well , the foam roller leaves a slight rough surface but i intend to wet sand this out after all the coats have been applied.